I try to practice drawing with pencil once everyday. Recently I've started posting scans of these practice sheets on my X account to share it with a bigger audience for feedback.
When I posted photos of my practice sheets directly from my phone, I found that the quality of the images were really bad - with lighting issues, paper looking too dark and dusty, pencil lines barely visible with low contrast.
I've already got Krita installed on my desktop. I tried cleaning-up the scans using Krita and this really improved the quality of the images. It takes a couple of minutes at most to cleanup a single scan.
Here's the procedure I use...
Note: you can click any image to view in a larger size
Scan your drawing
The first step of course is to scan your drawing. I use the onedrive app to "scan a photo". I recommend using a scan feature in a similar app instead of the camera app. The scan feature automatically detects the rectangular area of the paper and crops and straightens the paper area.
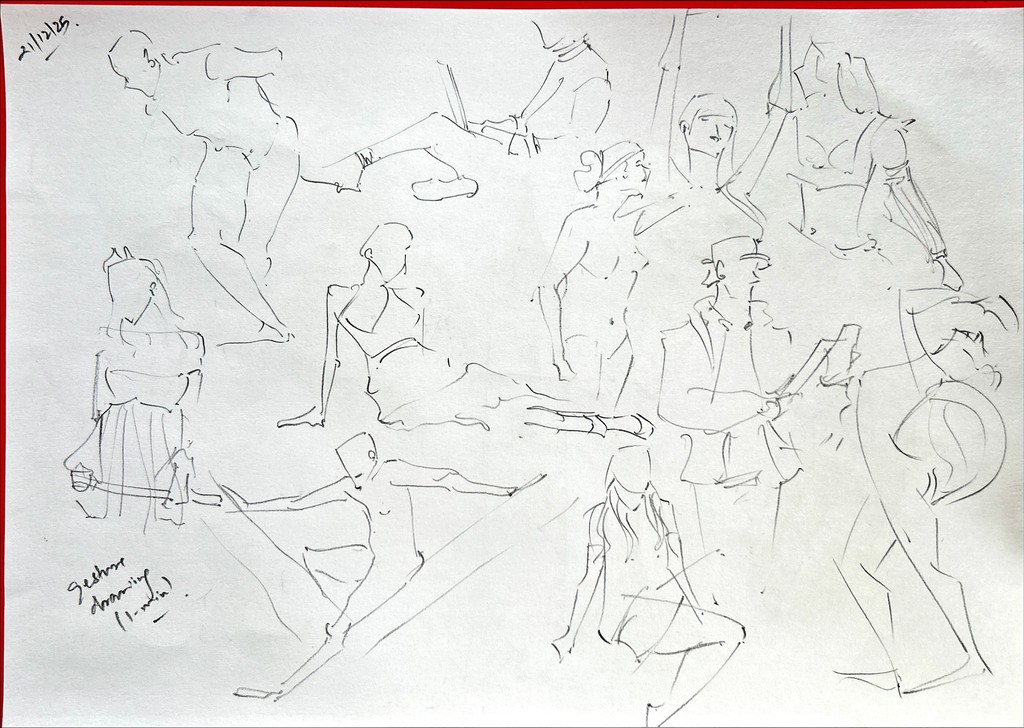
Here's the image we're going to use (it was scanned using the Onedrive app on my phone). You can see that the scan is not that great.
Open drawing image in Krita
Now lets open the image in Krita. Don't save the file yet, we will do that later.
Change colorspace to Grayscale
The first step is to convert our image to grayscale. We will use Krita's Color Space dialog.
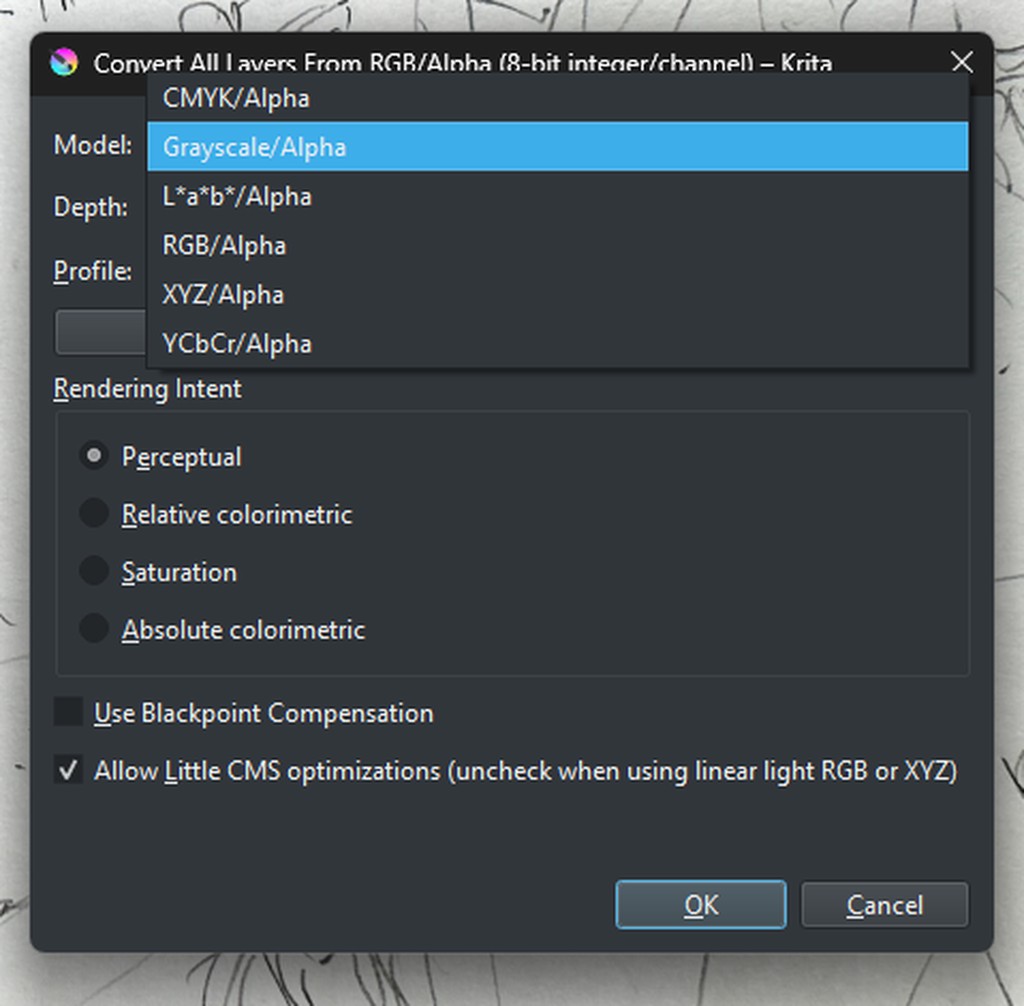
Open the dialog from the menu "Image -> Convert Image Color Space..."
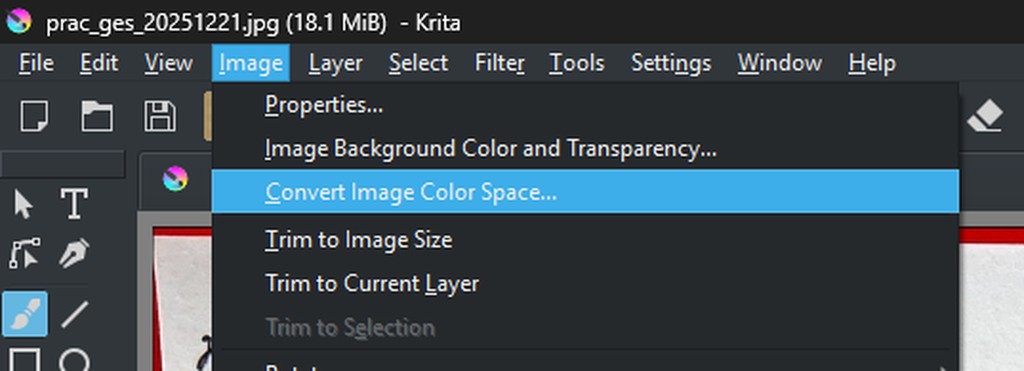
Now select "Grayscale/Alpha" from the "Model:" drop-down. Press ok to convert the image. You should now see the image in grayscale in the Krita canvas.
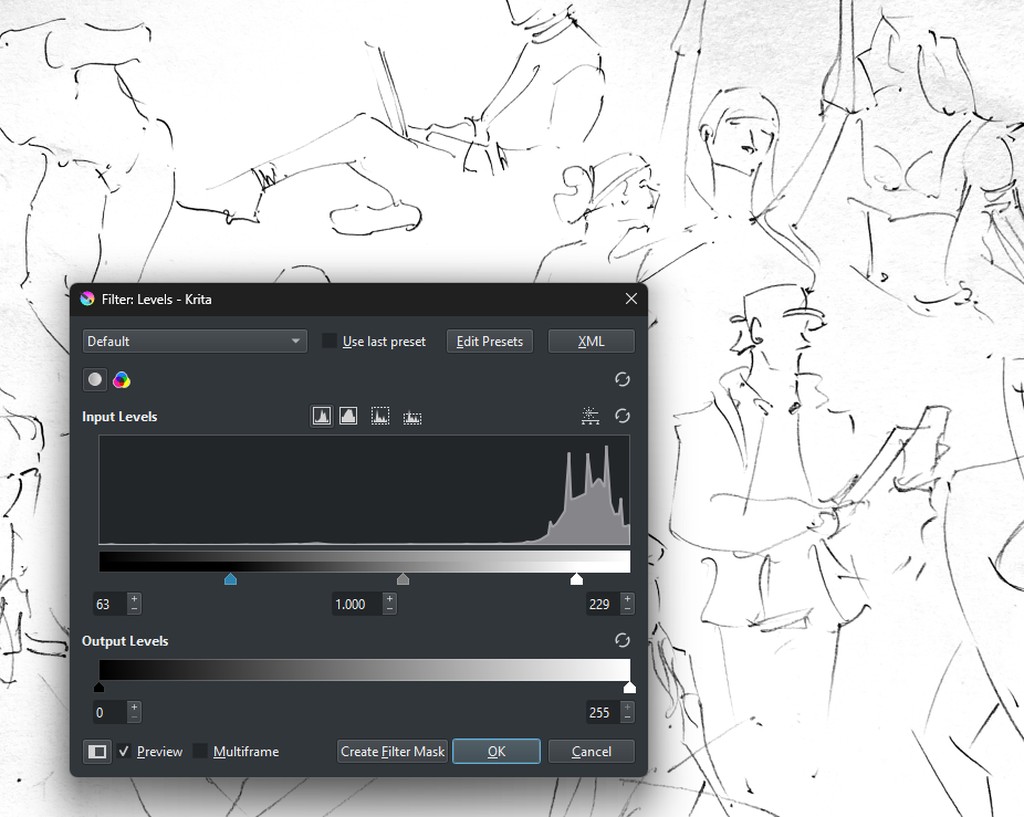
Adjust levels to get cleanup lines and dust
The second important step is to cleanup the lines, dust and contrast of the scan. We use Krita's "Levels" dialog to make the adjustments.
Open the dialog from the menu "Filter -> Adjust -> Levels...".
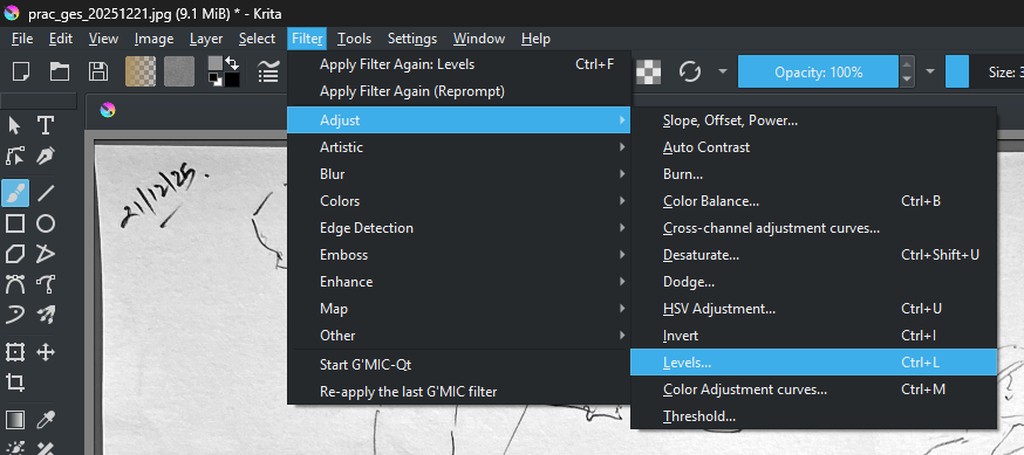
In the levels dialog move the "White point" arrow leftwards and the "Black point" arrow rightwards while keeping an eye on the canvas. Once you are happy with the results accept the changes with "Ok".
Note: you can also save the current levels as a preset for later reuse
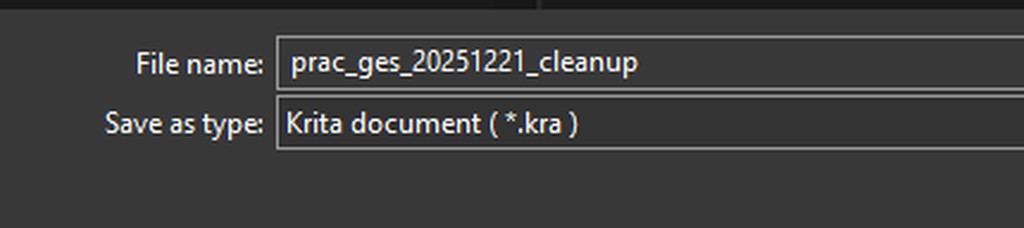
Save as .KRA file
Now save the image as a .kra file. This will help you come back and edit the file later if you are not happy with the results.
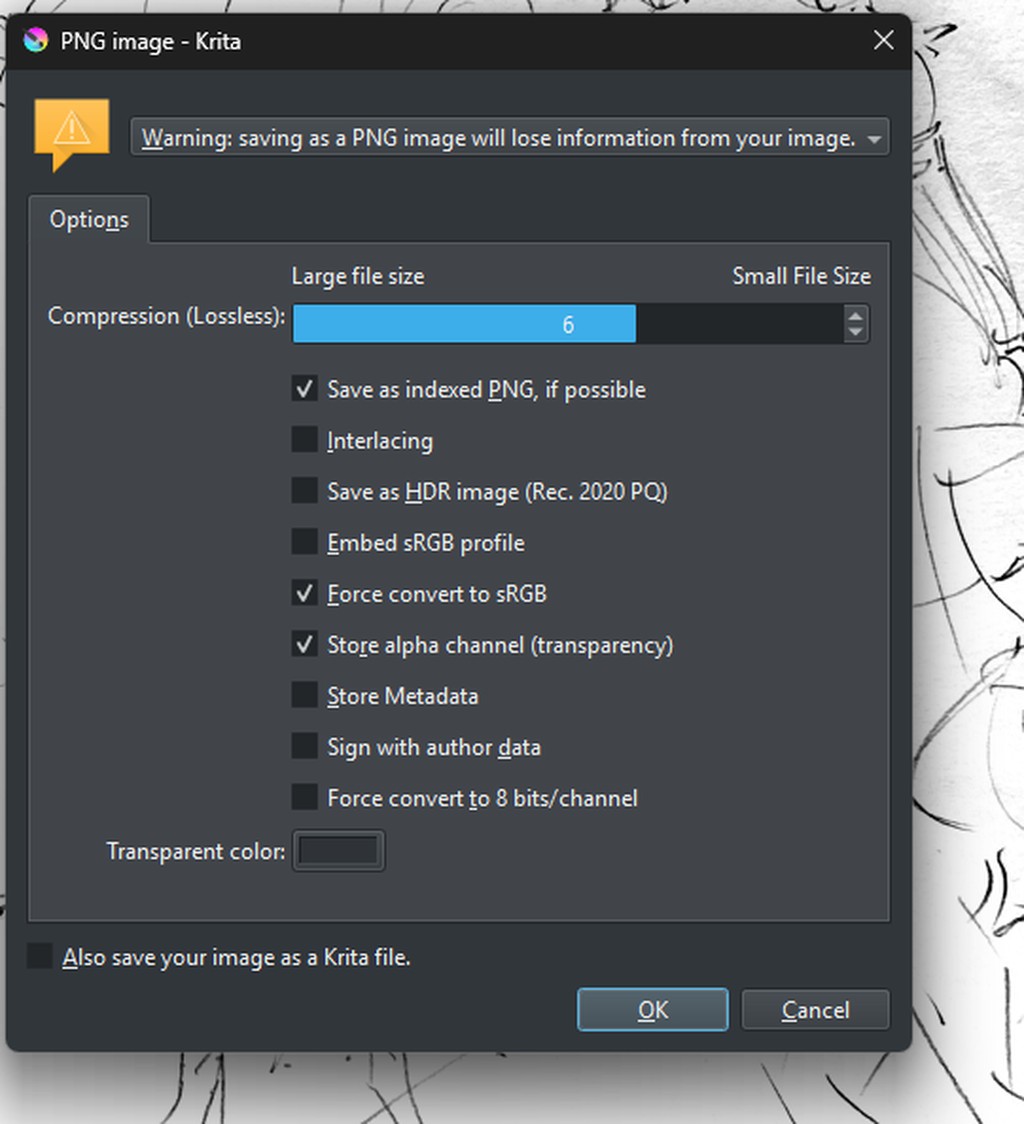
Export as PNG for posting to blog or social media
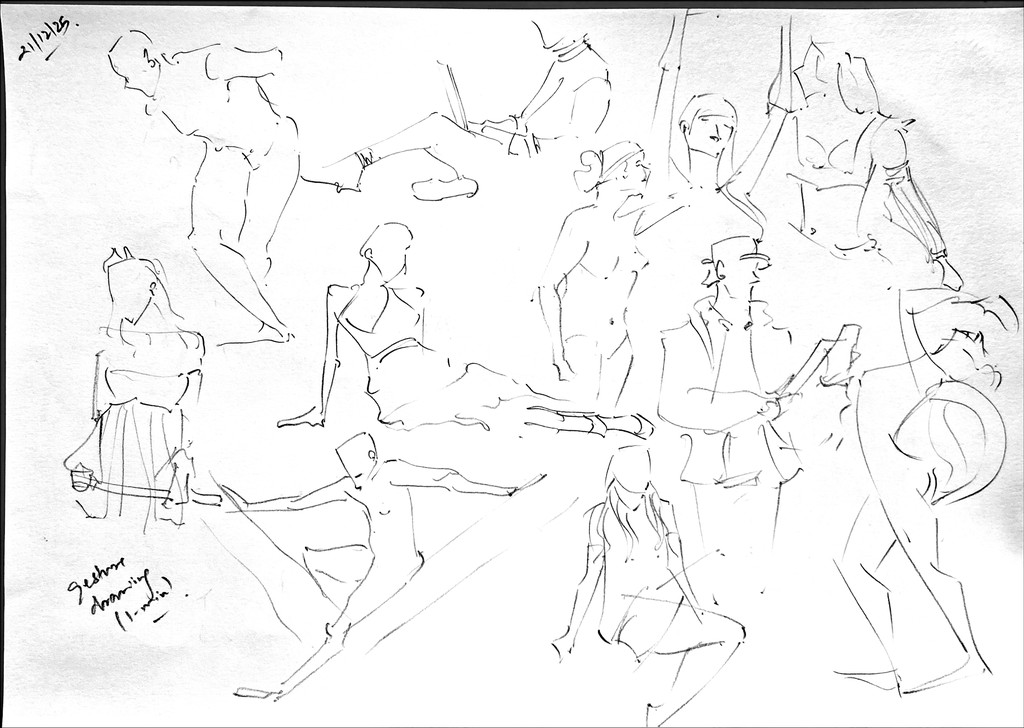
As a final step, export the file as a PNG file that you can post on your blog or social media.
Here's the final post for reference.
#gesture #drawing practice in #pencil (December 21st 2025) pic.twitter.com/R4TnuYOGFM
— ne0 (@ne0l4t3r4l) December 21, 2025
Hope this was helpful. Have a great day.